This week, I'm in Hong Kong and Jessica is in Honduras, but through the genius that is the Internet, I can still update the blog with at least a pictorial entry for now. I forgot to pack this week's recipes with me, so those will have to be uploaded when I get home this Sunday.
At this same time of year last year, I was travelling for the same work-related activity when my bestest friend gave birth to the most precious baby girl named Dakota. Over the last year, I've seen my bestie and her husband become the most wonderful parents to a beautiful, sweet and precious little girl. It's amazing how quickly time goes, but I look forward to watching this cutie pie as she grows. Seriously, I cannot get over her baby cuteness, though I admit, I may be biased. : )
Because I couldn't be there for her 1st birthday party, Amanda was sweet enough to let me bake the cake for Dakota's 1-year-old birthday photos. I just checked her photographer's blog, and lo and behold, there they were, as adorable as can be. Here are two photos with the cake, but seriously I love them all! I have to admit, the cake turned out pretty darn cute paired with Dakota's rockin' outfit!
Edited to add: recipes below!
Photo credit: Itsy Bitsy Photography
Earlier this month, Jessica and I went to Vroman's Bookstore in Pasadena for the book signing of a fellow food blogger named Joy the Baker. Jessica happened to notice she was going to be nearby, so we went, bought the book, met Joy, got the book signed, and had a fun evening out! In celebration of this delightful evening, and Dakota's birthday, I made the following JTB recipe. Yum!
Big Berry Birthday Cake*
adapted from Joy the Baker
*I left out the berries and made the recipe twice to get four layers.
Makes a 2 layer 8-inch cake or 24 cupcakes
Ingredients
2 sticks unsalted butter, softened to room temperature
1 3/4 cups granulated sugar
4 large eggs
1 cup whole milk
1 Tablespoon vanilla extract
1/2 vanilla bean, seeds scraped out
2 3/4 cups all-purpose flour
1 1/2 teaspoons baking powder
1/2 teaspoon salt
Directions
Preheat oven to 350 degrees F. Butter and flour two 8-inch round baking pans and set aside.
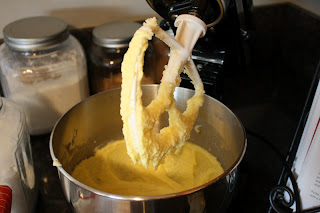
In a stand mixer fit with a paddle attachment, cream the butter and sugar on medium speed for 3 to 5 minutes or until light and fluffy. Scrape the sides of the bowl with a rubber spatula to ensure that everything is well mixed. Add the eggs, one at a time, beating for one minute after each addition.
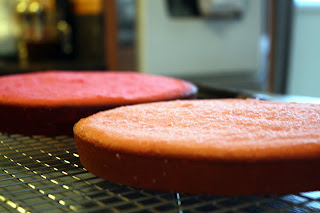
In a small bowl whisk together flour baking powder and salt. In a separate small bowl combine the milk, vanilla extract and vanilla seeds. With the mixer on low speed, alternate adding the flour mixture and the milk mixture in three batches. Start and end with the flour mixture. When the batter is just combined, shut off the mixture and thoroughly incorporate the dough with a rubber spatula. At this point, gently whip in your food coloring to your desired shade (in my case, two different shades of pink!).
Divide the batter between the two pans.
Let the cakes cool in the pan for 15 minutes before inverting onto a wire rack to cool. Frost only when cakes are completely cool.
When your cake has cooled, stack all of your layers and trim up your cake to the desired size. I wanted mine a little smaller, and also wanted to make it more uniform in size, so I trimmed a bit of the edges, as well as around the outside. Then I snacked on the extra cake. : )
Here's the basic crumb coat (above) before I started to thin down the sides to take off the extra frosting. Make it really smooth, and then begin to add more frosting if you are just doing a simple frosted cake, or place your frosting in a piping bag, and begin to make swirls like below.
Once your cake is covered with swirls, roses, dots, or whatever your fancy, cover your cake in Disco Dust if you'd like! It's an edible glitter that you can buy at a cake and candy supply store. Fun!
Review: I can't really write a proper review on this one because Dakota got to eat the real cake. : ) However, from what I could tell (and the small, trimmed pieces I ate), the cake was fluffy, soft, and moist. It also did not fall apart when I frosted it like some cakes will--a winner in my book!
Enjoy!
Jennifer
Jessica's secret ingredient is tomatoes!!


You are so cute Jen Jen, love it!!
ReplyDeleteYou are the best bestie ever. Dakota loved her cake, and I love that you made it!
ReplyDelete